Edit Node
Once you have added or imported a node, you may need to edit the configuration settings for one reason or another. For example, to change the environment that the node is assigned to, or update the connectivity details. Or, you may want to edit the node's customizable scan options. The following topic describes how to access and edit an individual node's settings, including the various options that are available to configure a node. For more information on how to add a node to your Cloudhouse Guardian (Guardian) instance, see Add Nodes.
To edit a node, complete the following steps:
-
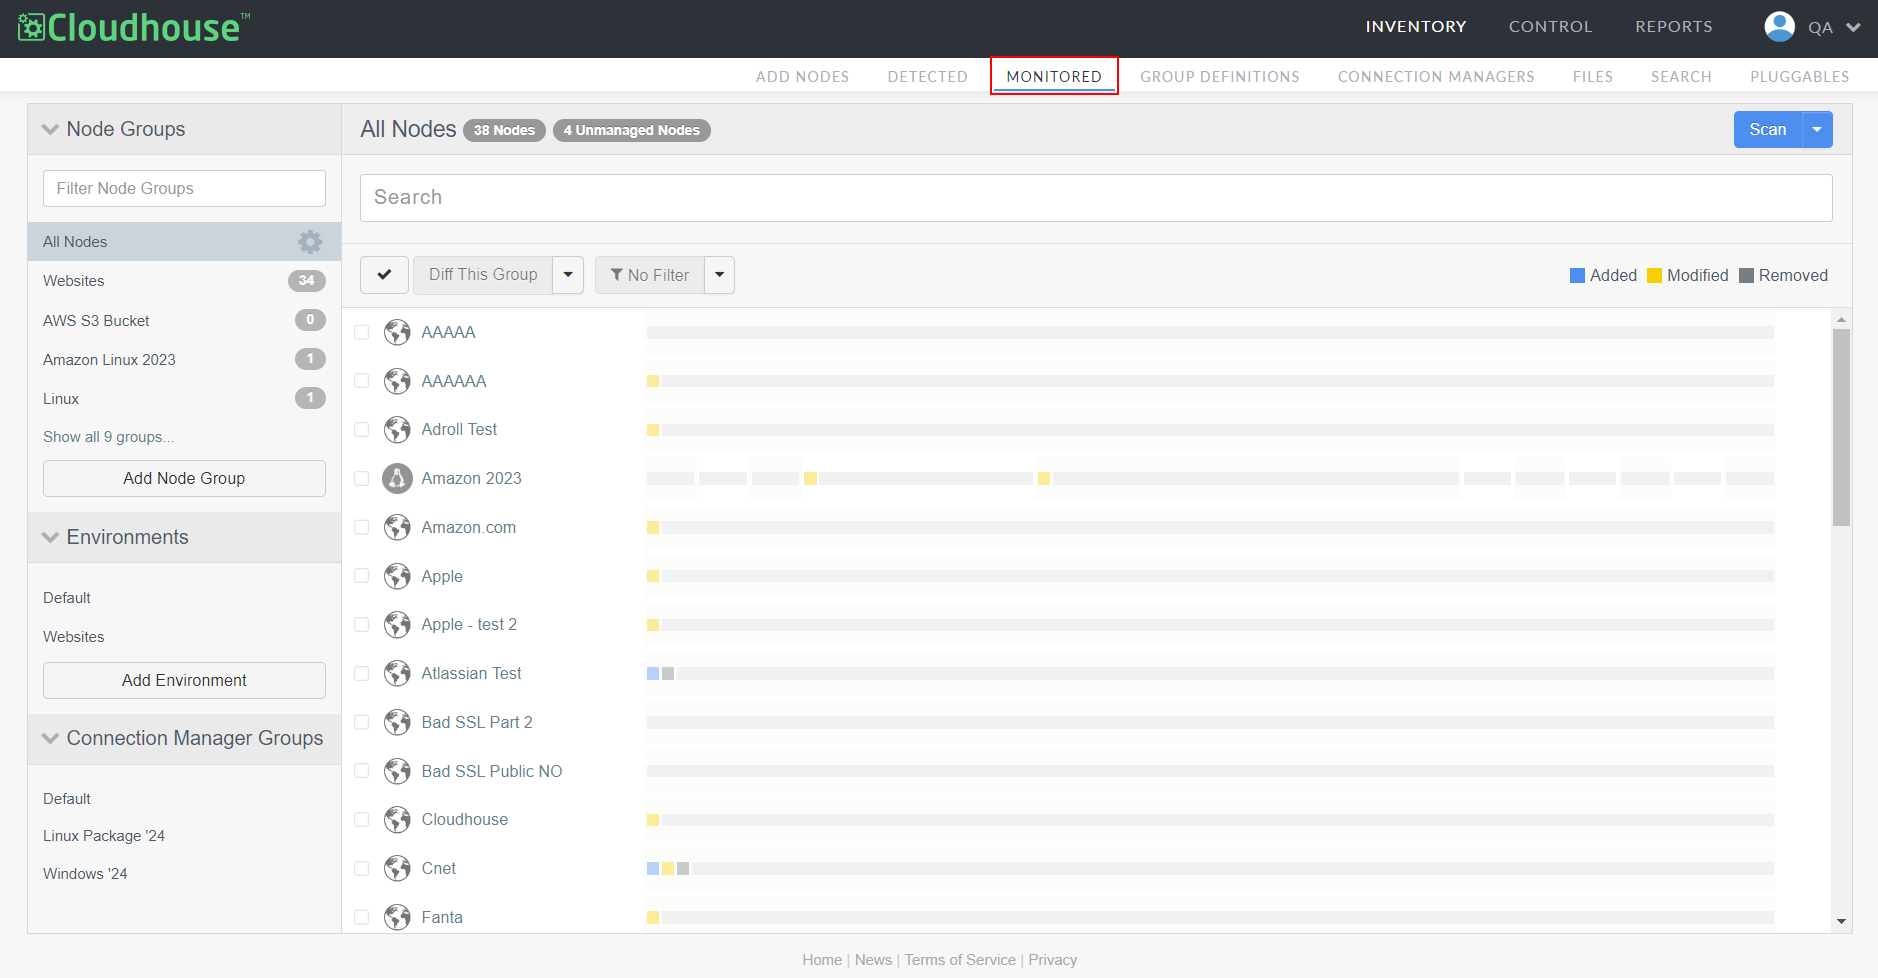
In the Guardian web application, navigate to the Monitored tab (
-
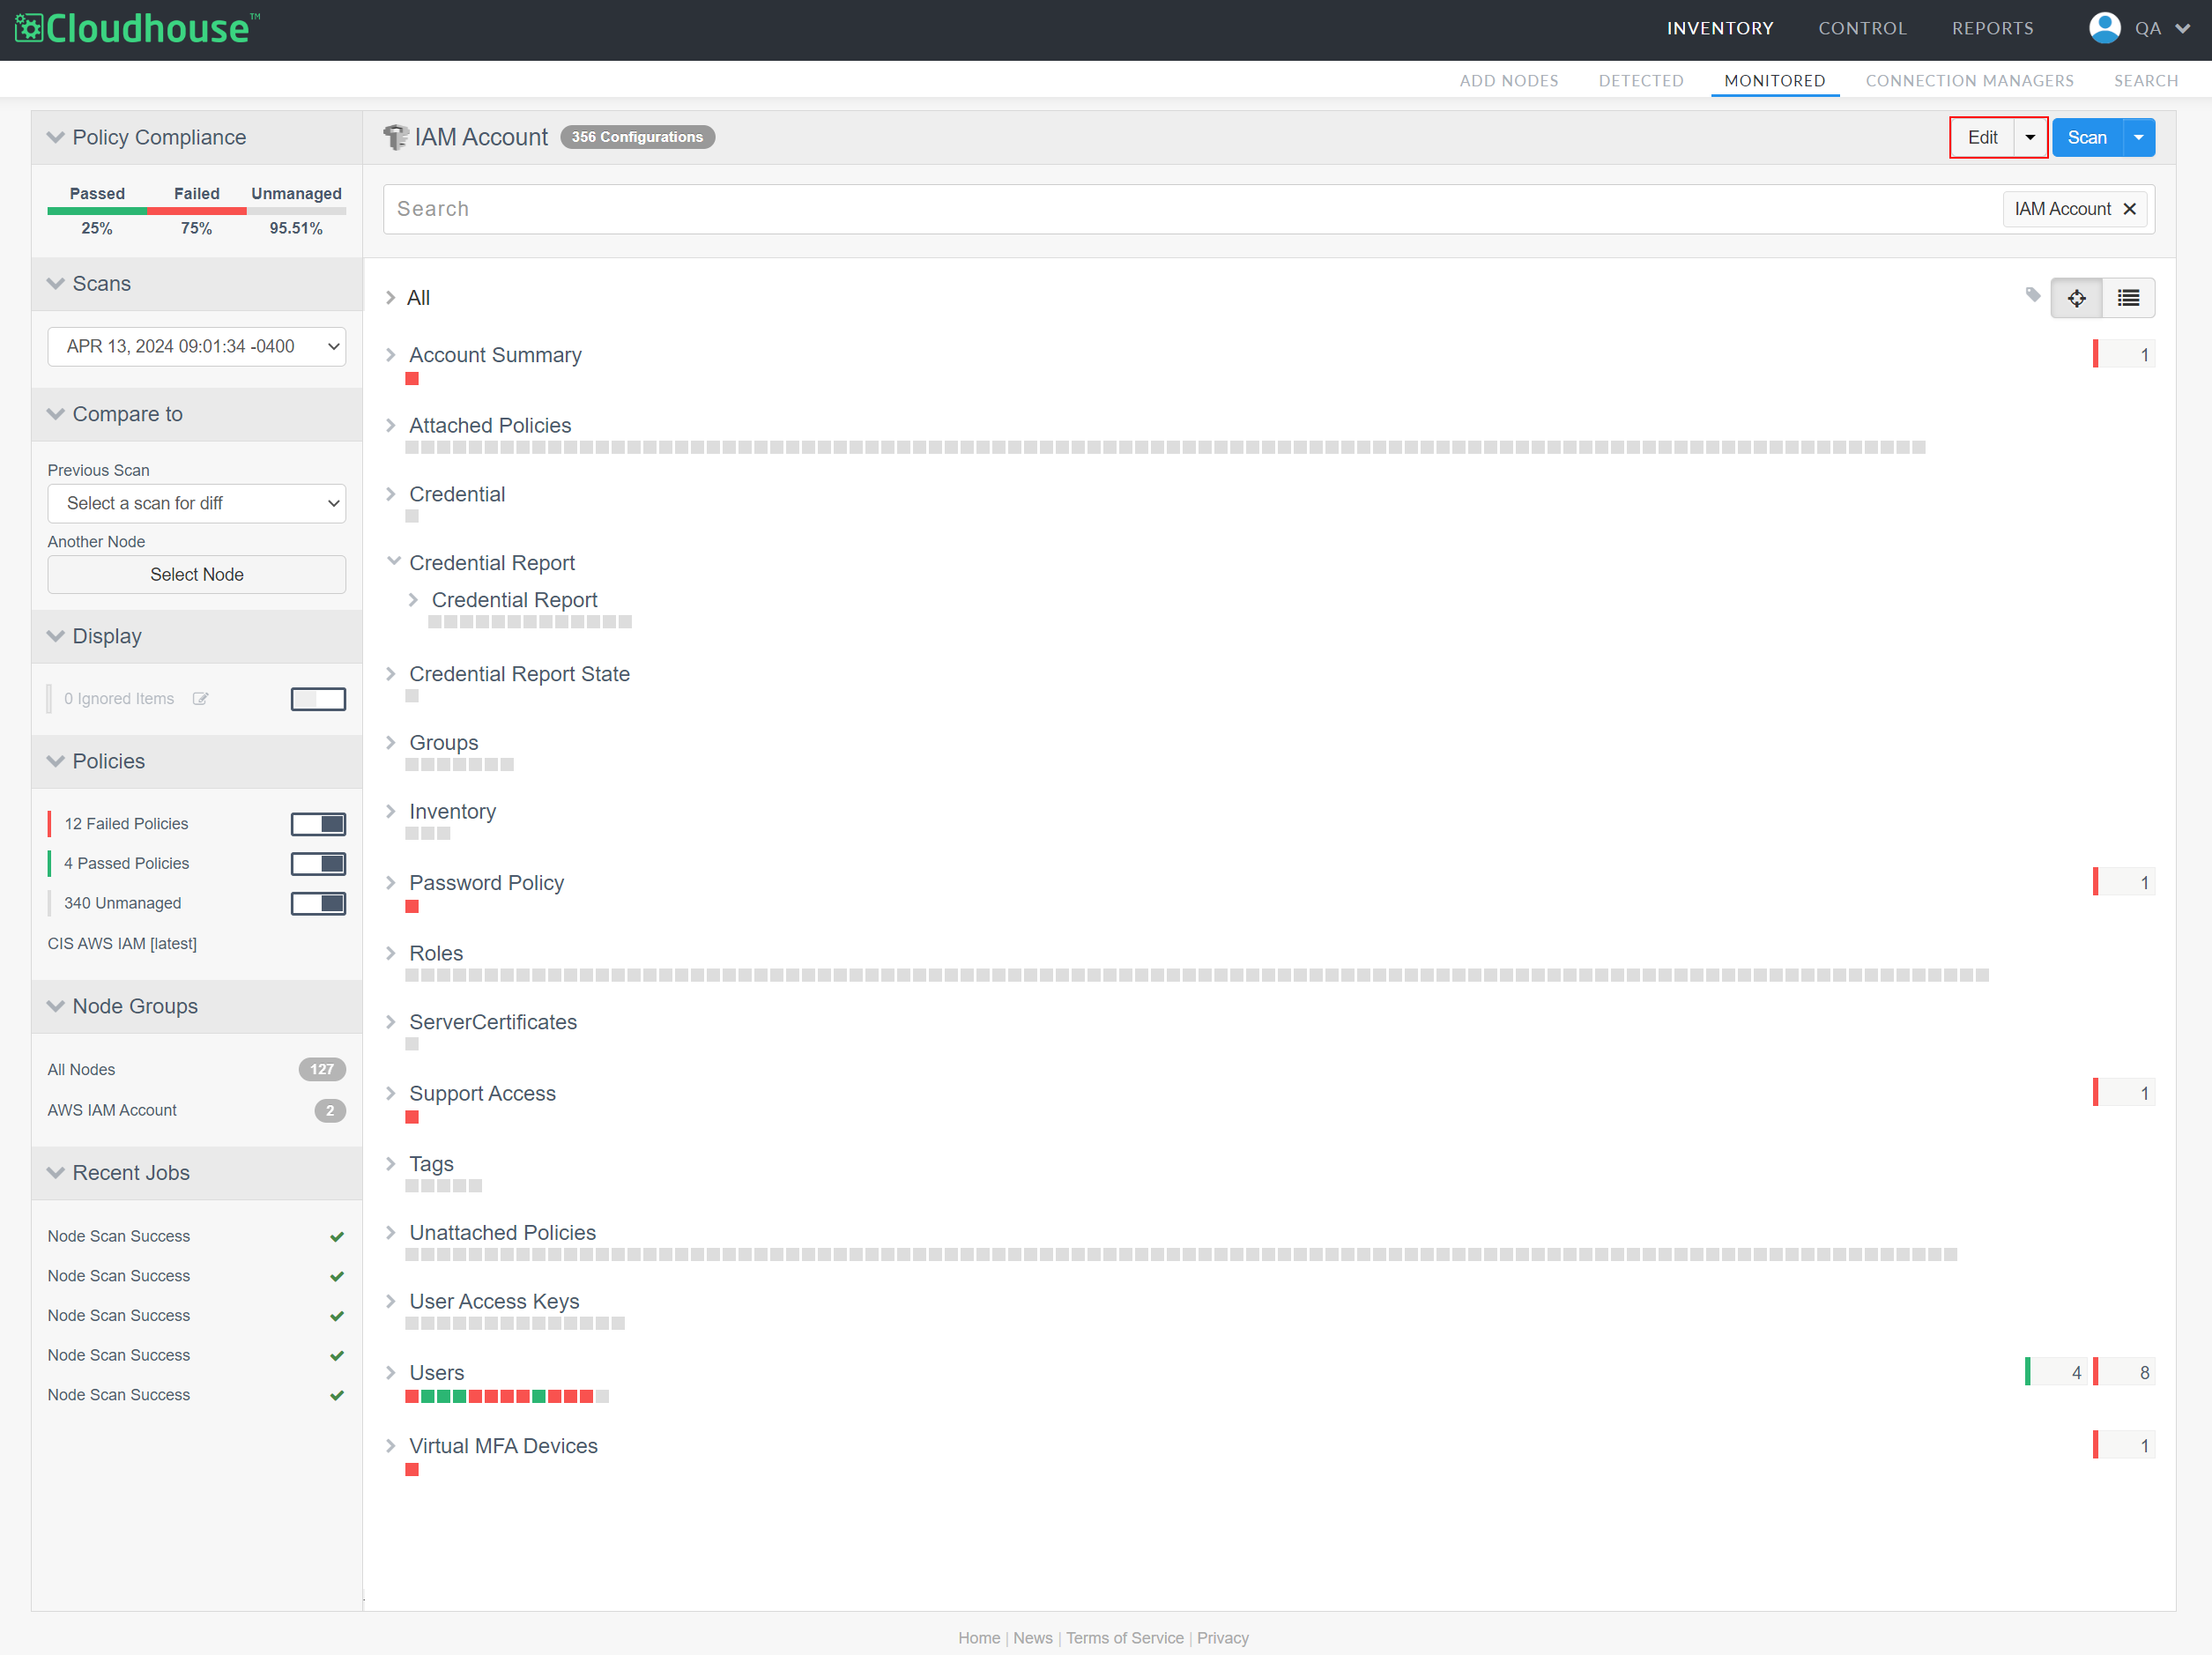
In the Node Groups drop-down menu, select the node that you want to access from the 'All Nodes' node group. The results of the most recent scan are displayed. For more information on node scan results, see Node Scan Results.
-
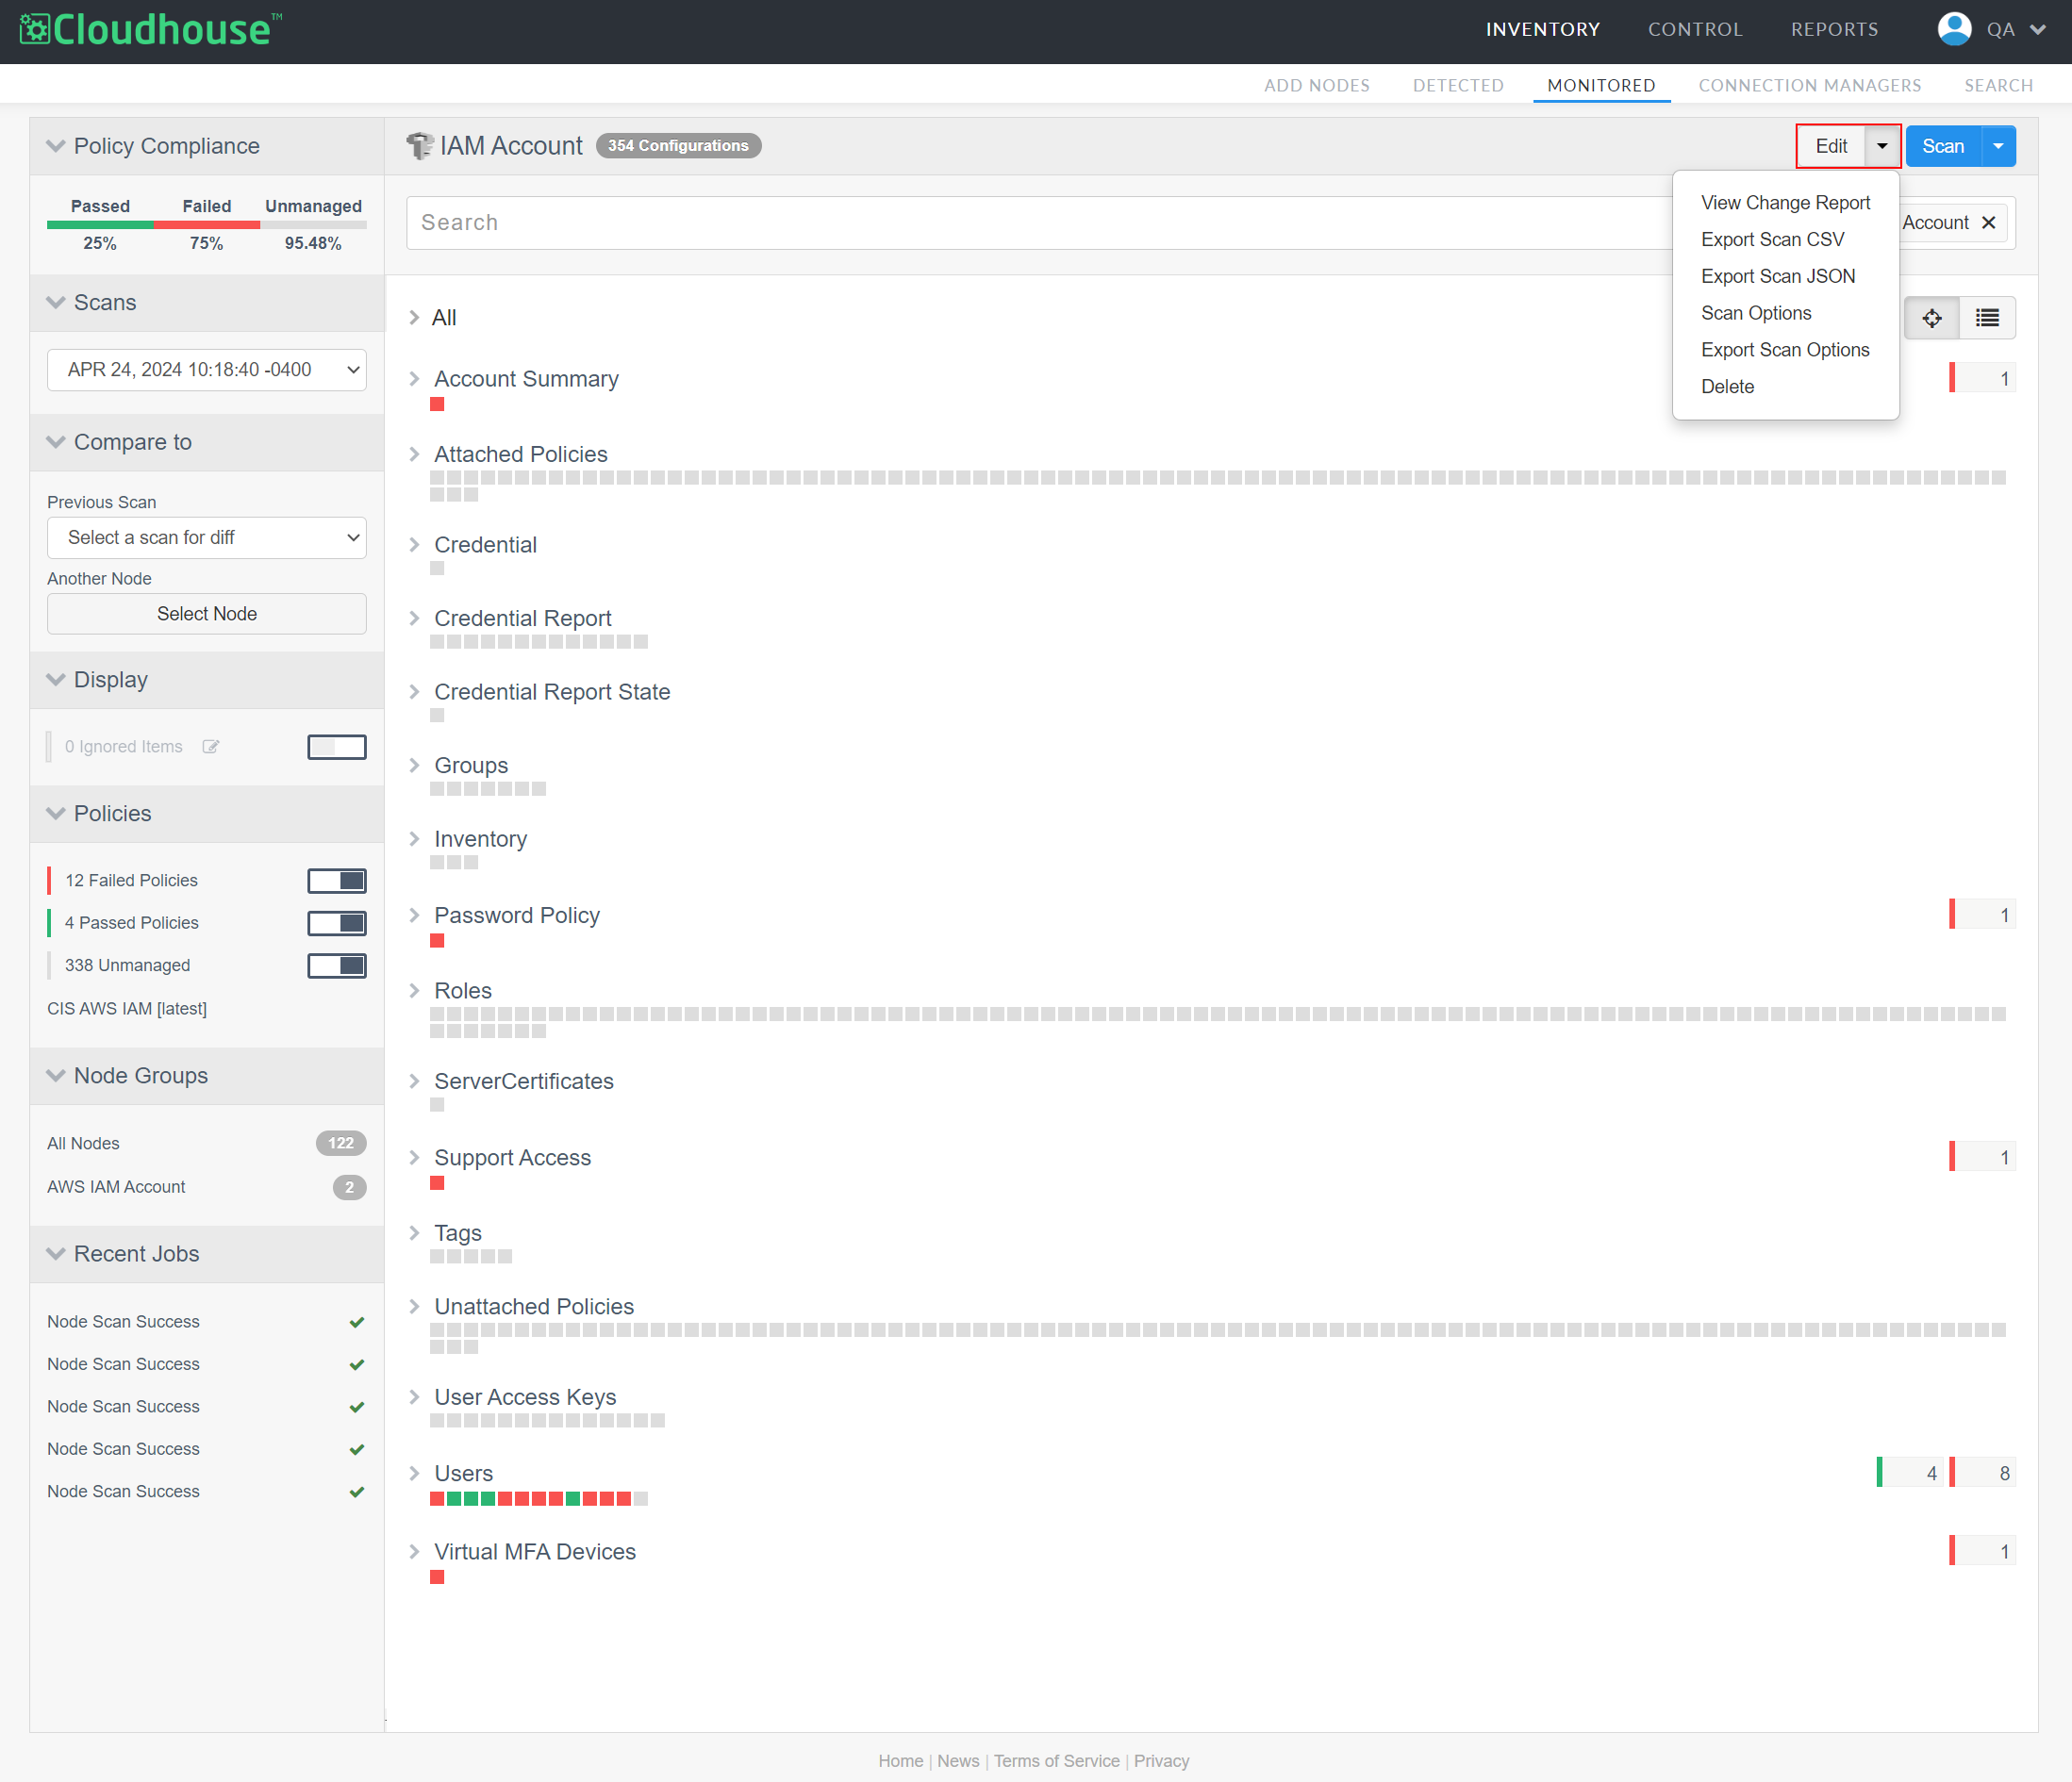
Click the Edit button in the top-right corner of the page. The Edit Node page is displayed.
Tip: Alternatively, you can click the Edit drop-down to display a list of configurable options, see Edit Node Options below for more information.
-
Here, following options are available to customize:
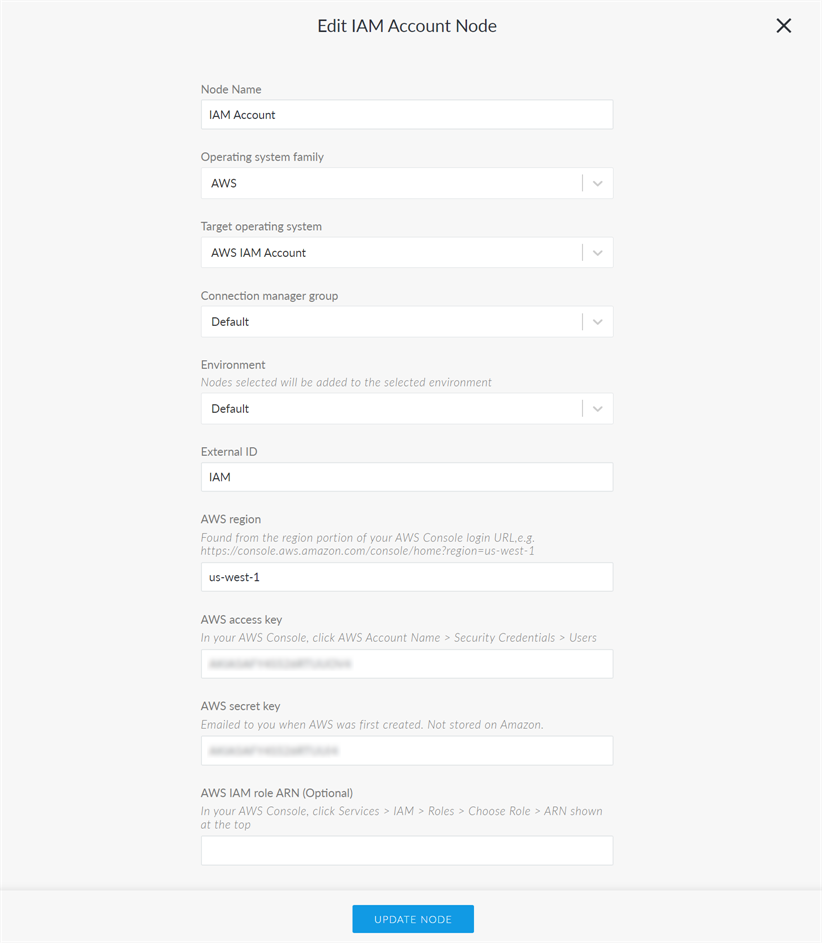
Note: The options displayed here vary according to node type. For example, an AWS node would display AWS-specific fields such as AWS Region. The fields below are displayed for all nodes types.
Option
Description
Node Name field The display name for the node. Operating system family field The top-level operating system family that the node belongs to. For example, 'Windows' or 'Linux'.
Target operating system field The target operating system that the node is running on. For example, 'Windows XP' or 'Linux Directory'. Connection manager group drop-down list
The Connection Manager Groups that is responsible for scanning your node. Select a new Connection Manager group from the drop-down list.
Environment drop-down list The Environments that the node is assigned to. Select a new environment from the drop-down list. External ID field The property required to authorize Guardian's connection to the node. Short description field Optional ability to provide a short description of the node. SSH Key radio button Select to display the SSH key required for key-based authentication. Password radio button Select to display the Password field required for username/password-based authentication. Enter the password of the user account configured to use SSH.
Note: Alternatively, for V4.3.46.0 of Guardian onwards, selecting the Password radio button displays the Credentials drop-down list. Here, you can select an existing credential or add a new one. For more information, see Credentials.
Service Account radio button The password of the service principal configured to use SSH. -
Once complete, click to Update Node.
The node is updated and displayed in the Monitored tab.
Edit Node Options
The following list of configurable options are displayed when you click the Edit drop-down:
| Option | Description |
|---|---|
| View Change Report |
Click to generate a detailed change report for the selected node. If selected, the Change Report tab (Reports > Change Report) is displayed. Here, you can set a Time Span and filter options to customize the output. For more information, see Change Report. |
| Export Scan CSV | Click to export the results of the current recent scan within a CSV file. If selected, the file is downloaded locally to your device. |
| Export Scan JSON | Click to export the results of the most recent scan within a JSON file. If selected, the file is downloaded locally to your device. |
| Connectivity | This option is only displayed for Agentless nodes. Option to perform a connectivity check between the node server and the Guardian database. If selected, the Connectivity Results dialog is displayed and a connectivity check is run. |
| Scan Options |
Click to display the Scan Options page for the selected node. Here, you can view and customize the currently configured custom scan options for the node's configuration items. For more information, see Scan Options. |
| Export Scan Options | Click to export the complete set of node scan options within a file. If selected, the file is downloaded locally to your device within your format of choice. |
| Delete | Click to permanently delete the node. If selected, a confirmation dialog is displayed. Click OK to confirm the action. |